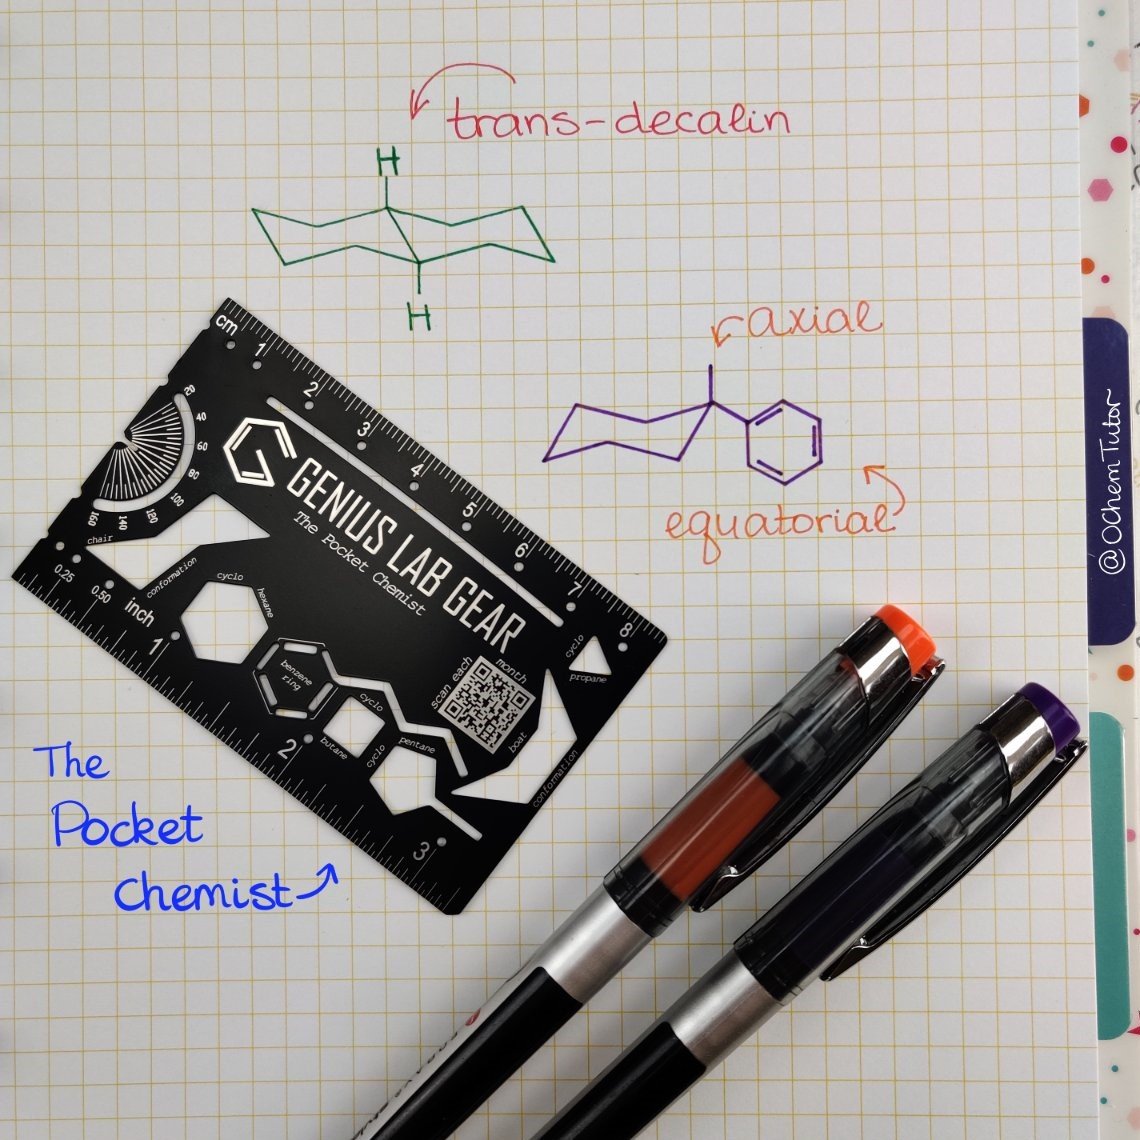
How to use The Pocket Scientist High School Edition
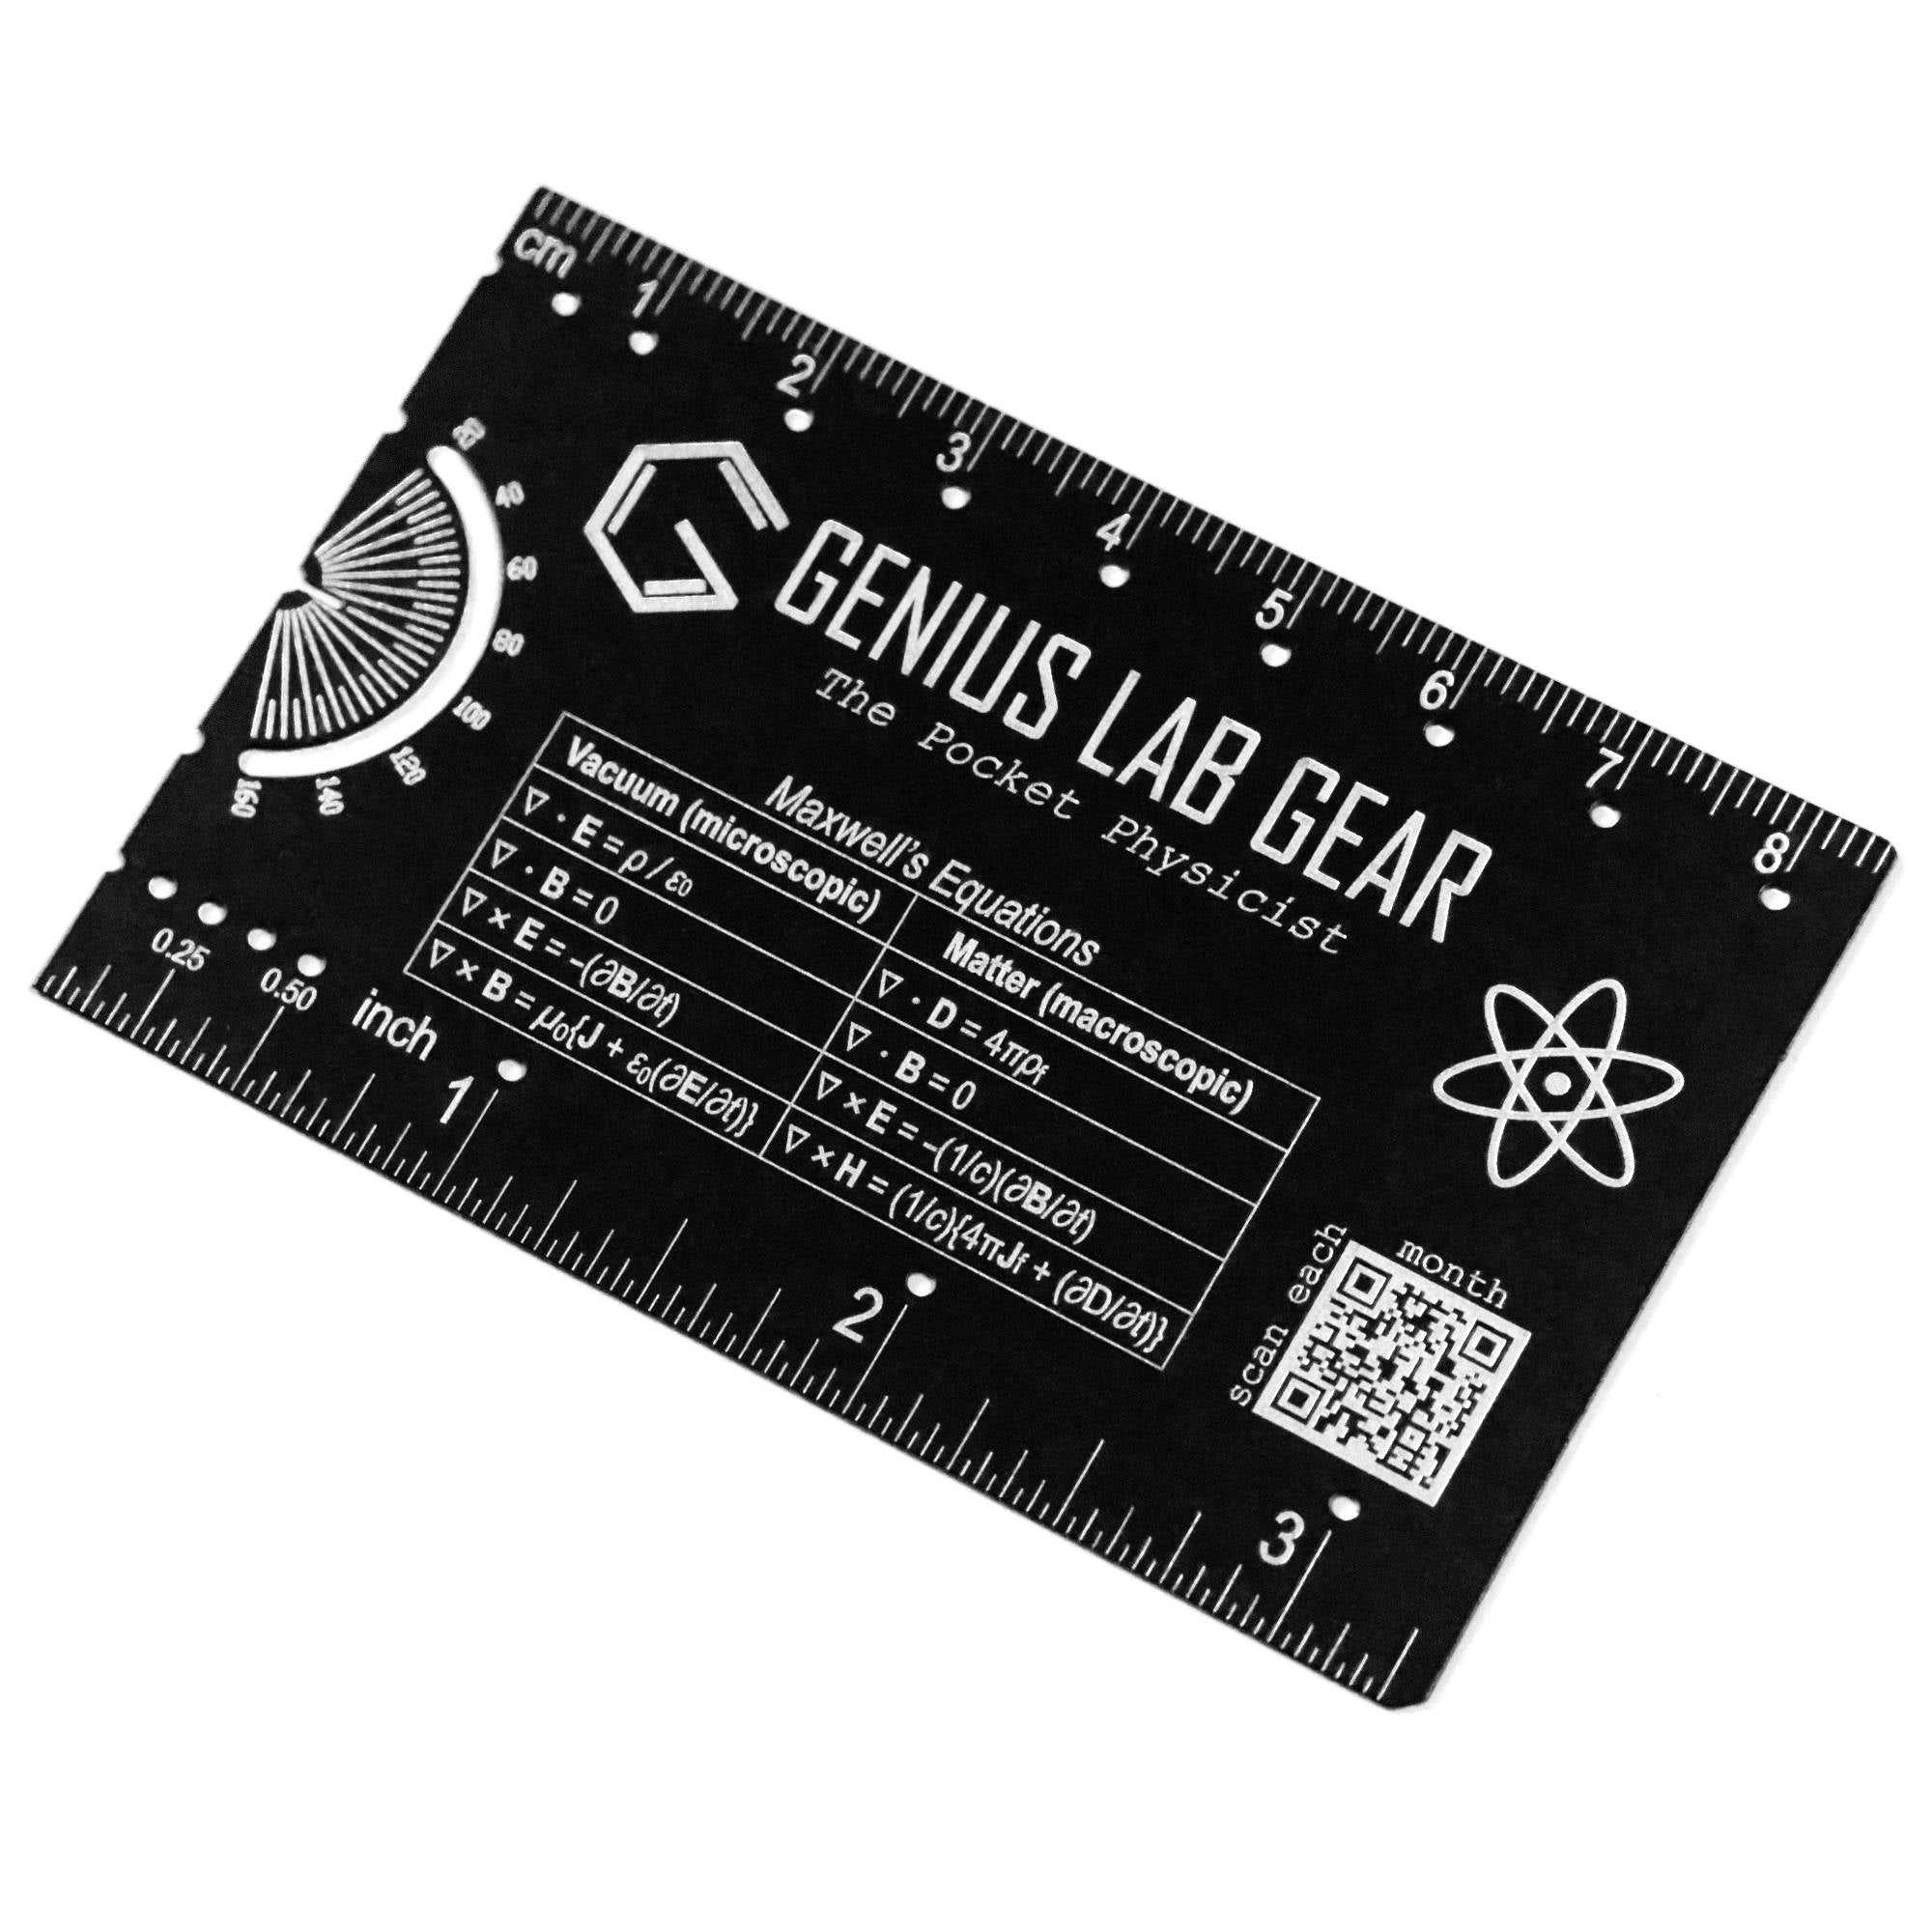
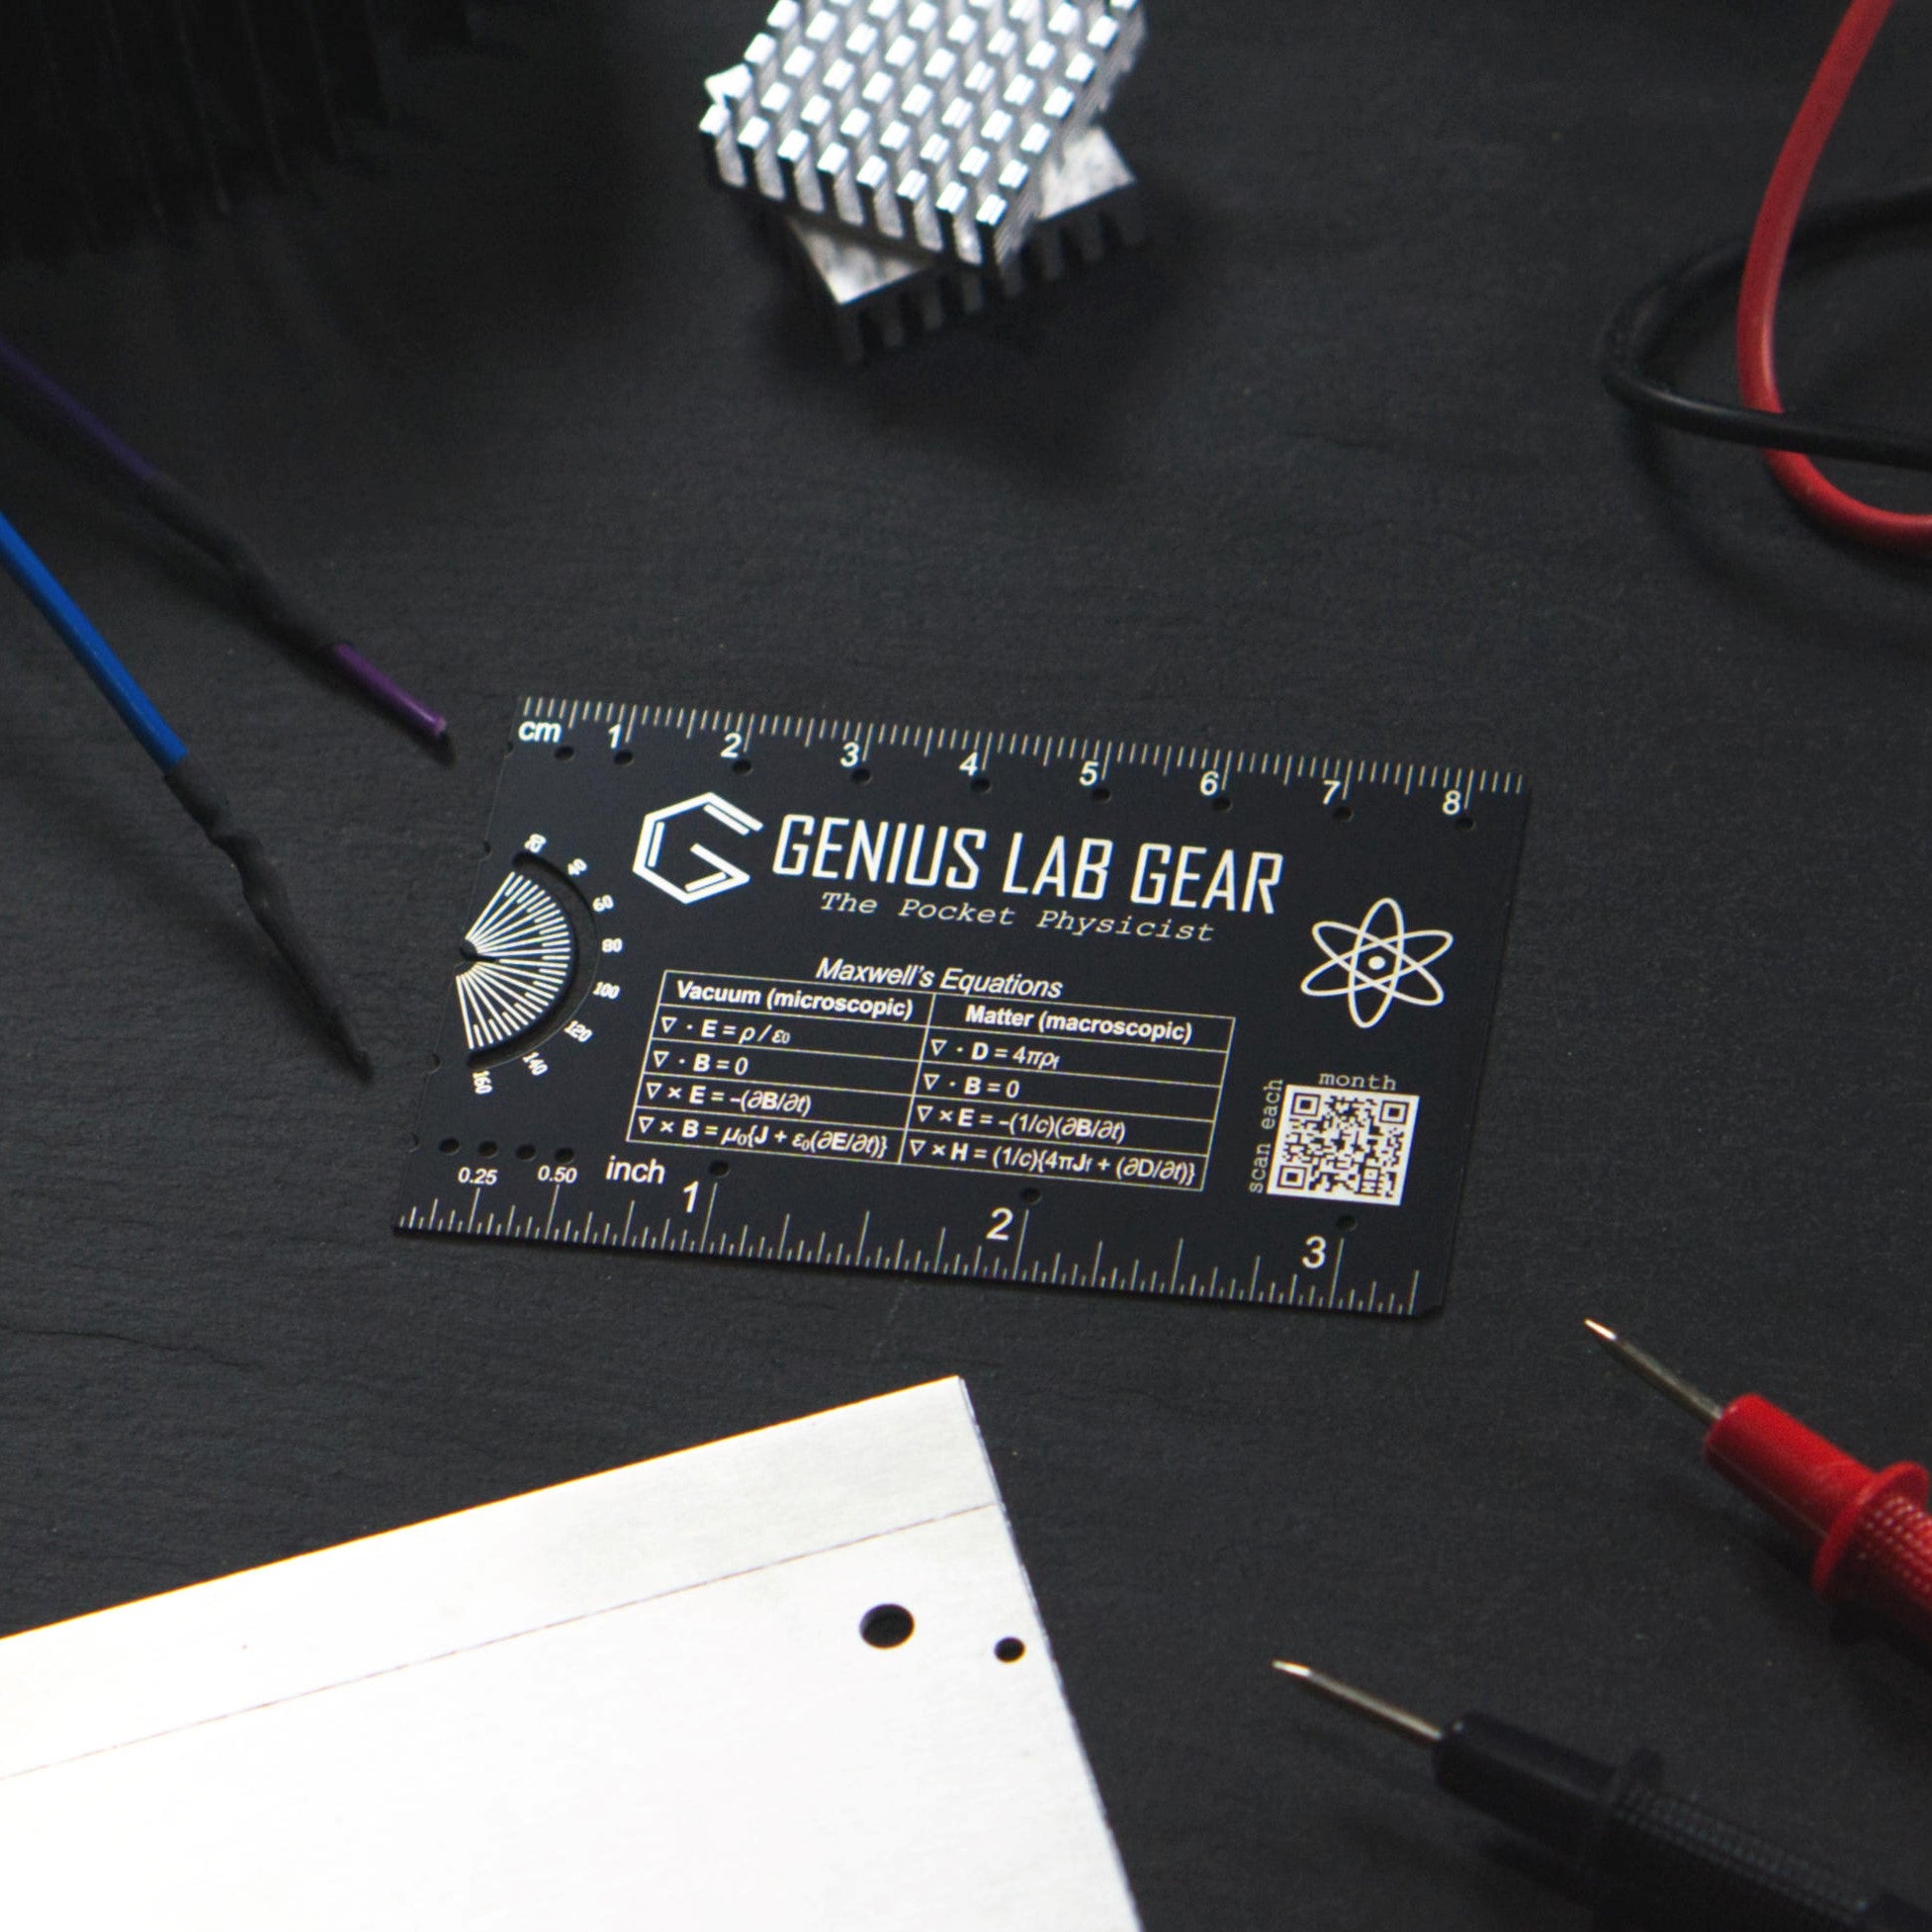
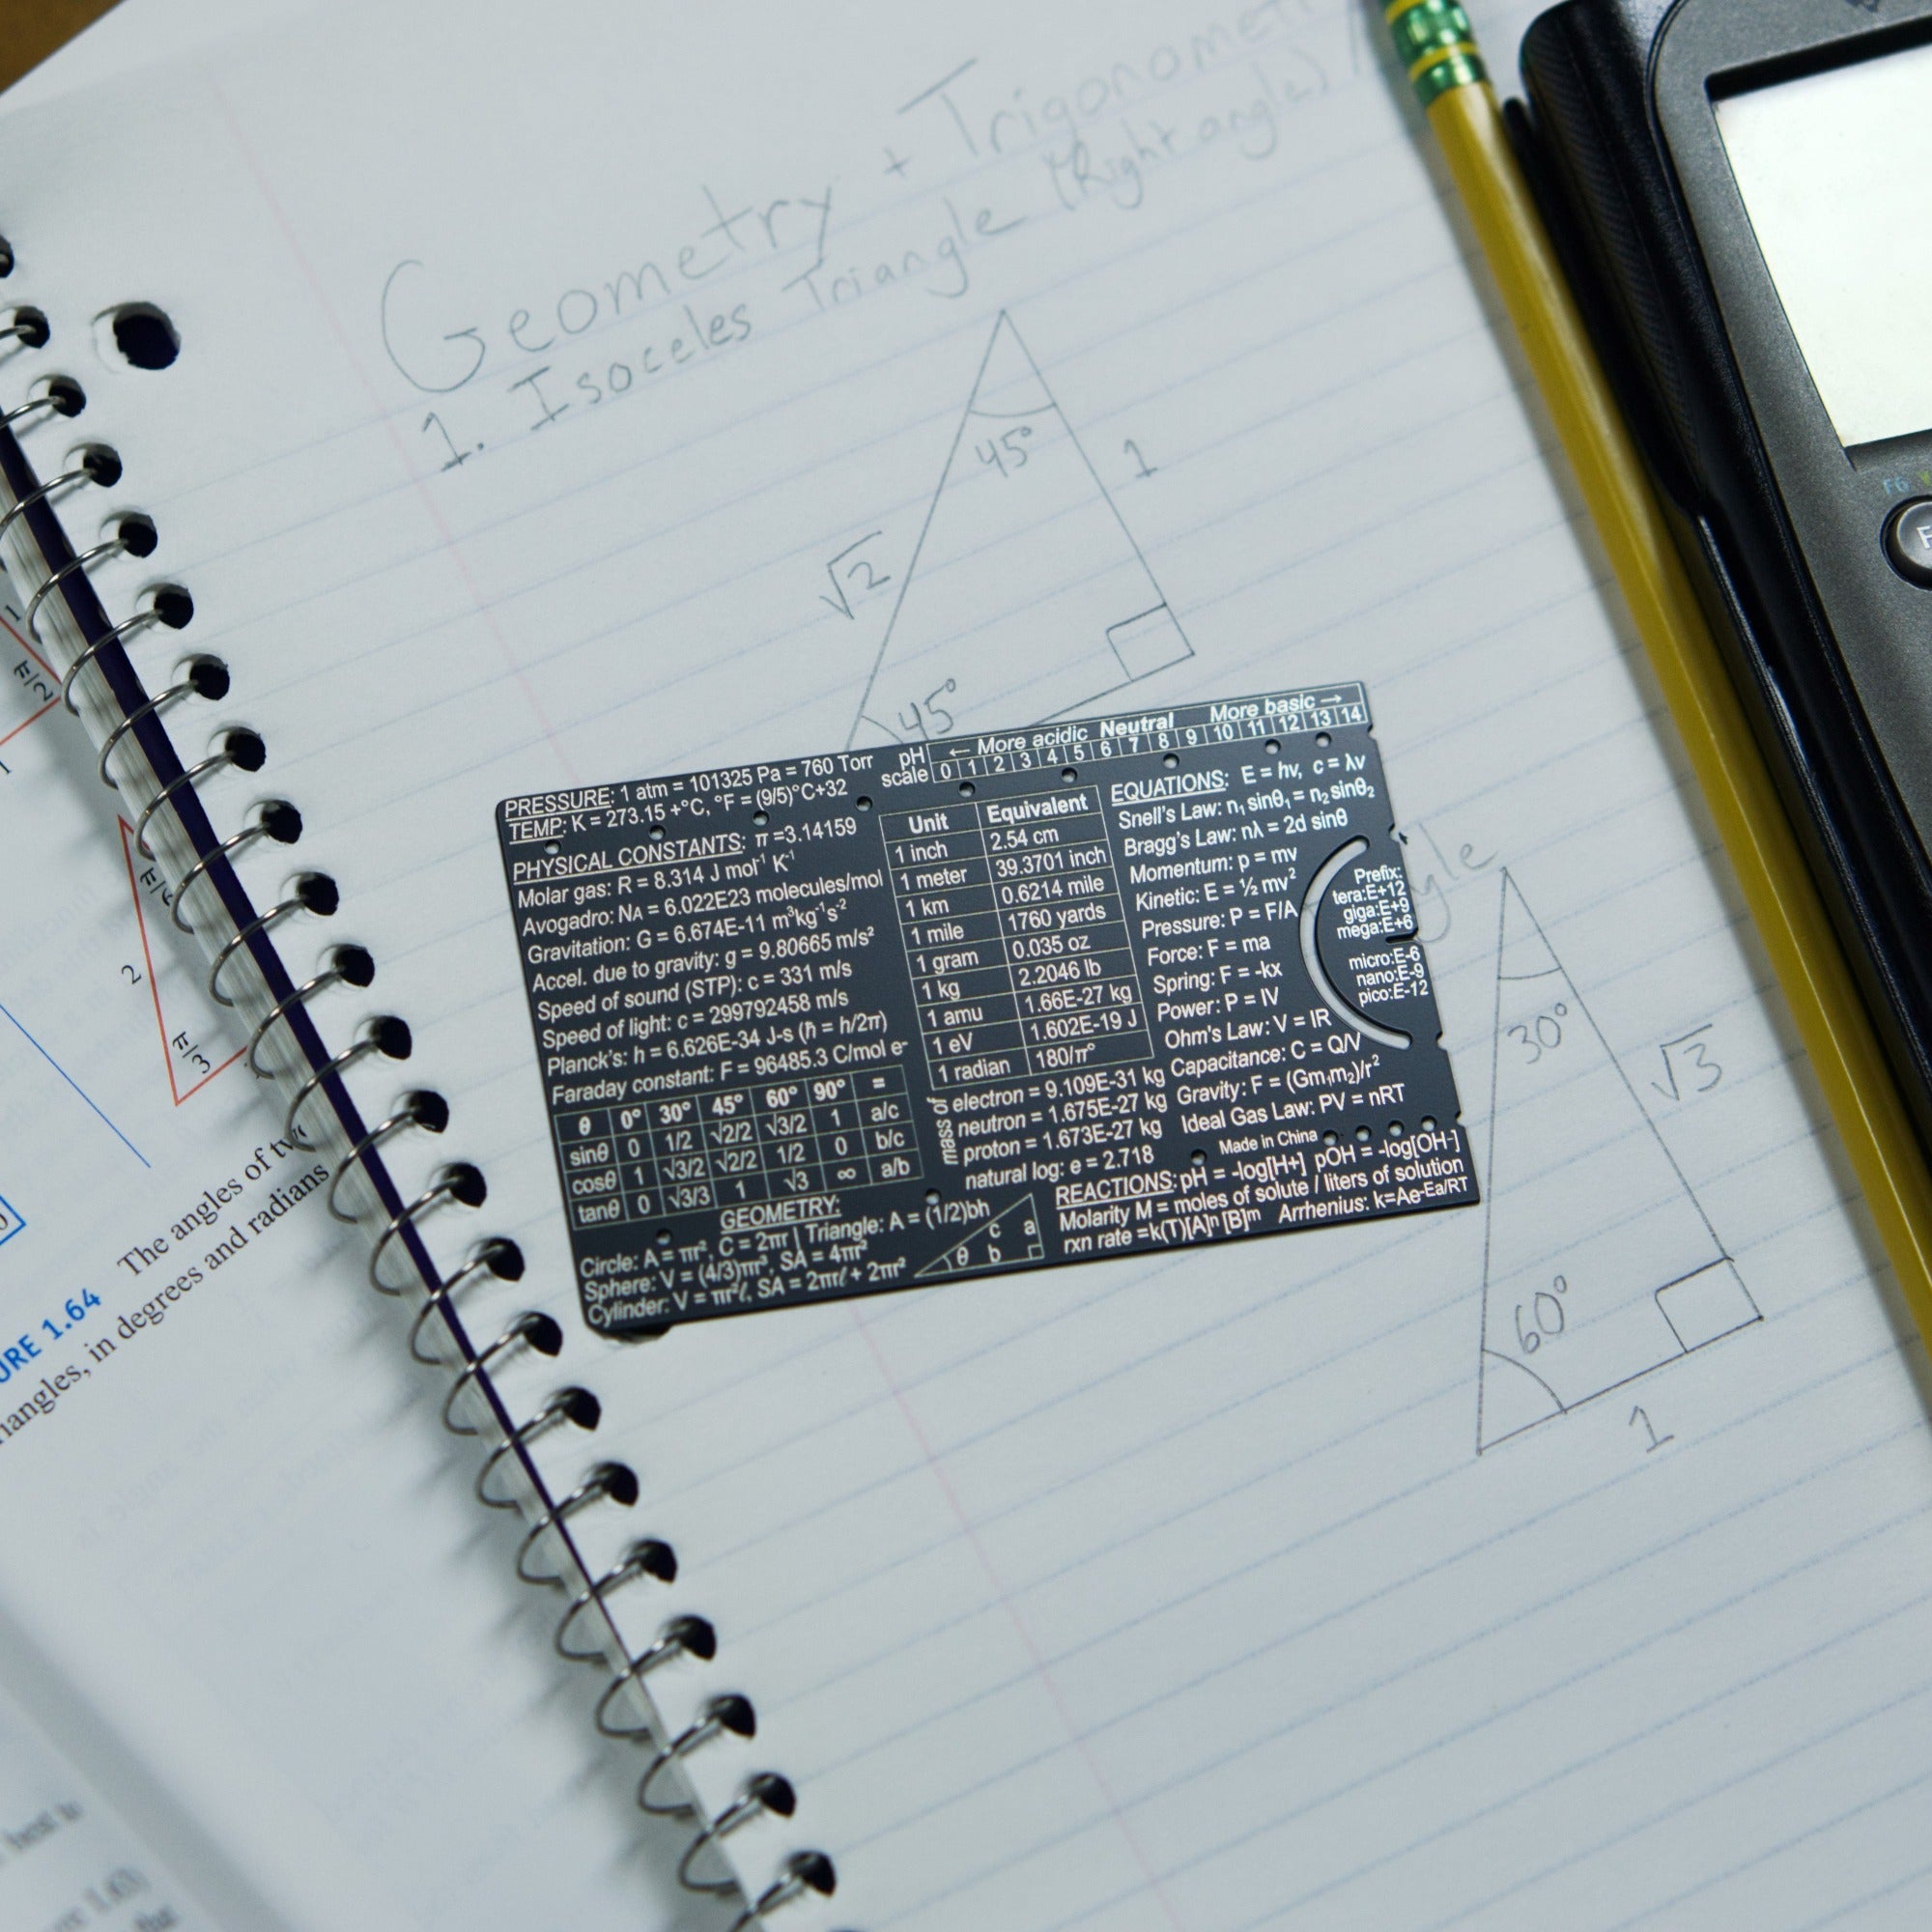
The Pocket Scientist - High School Edition is an every-day carry tool designed for students ages 13-19 interested in STEM. We've packed as many handy tools and references as possible into this little laser-engraved stainless steel card to help them learn the fundamentals of science and engineering.


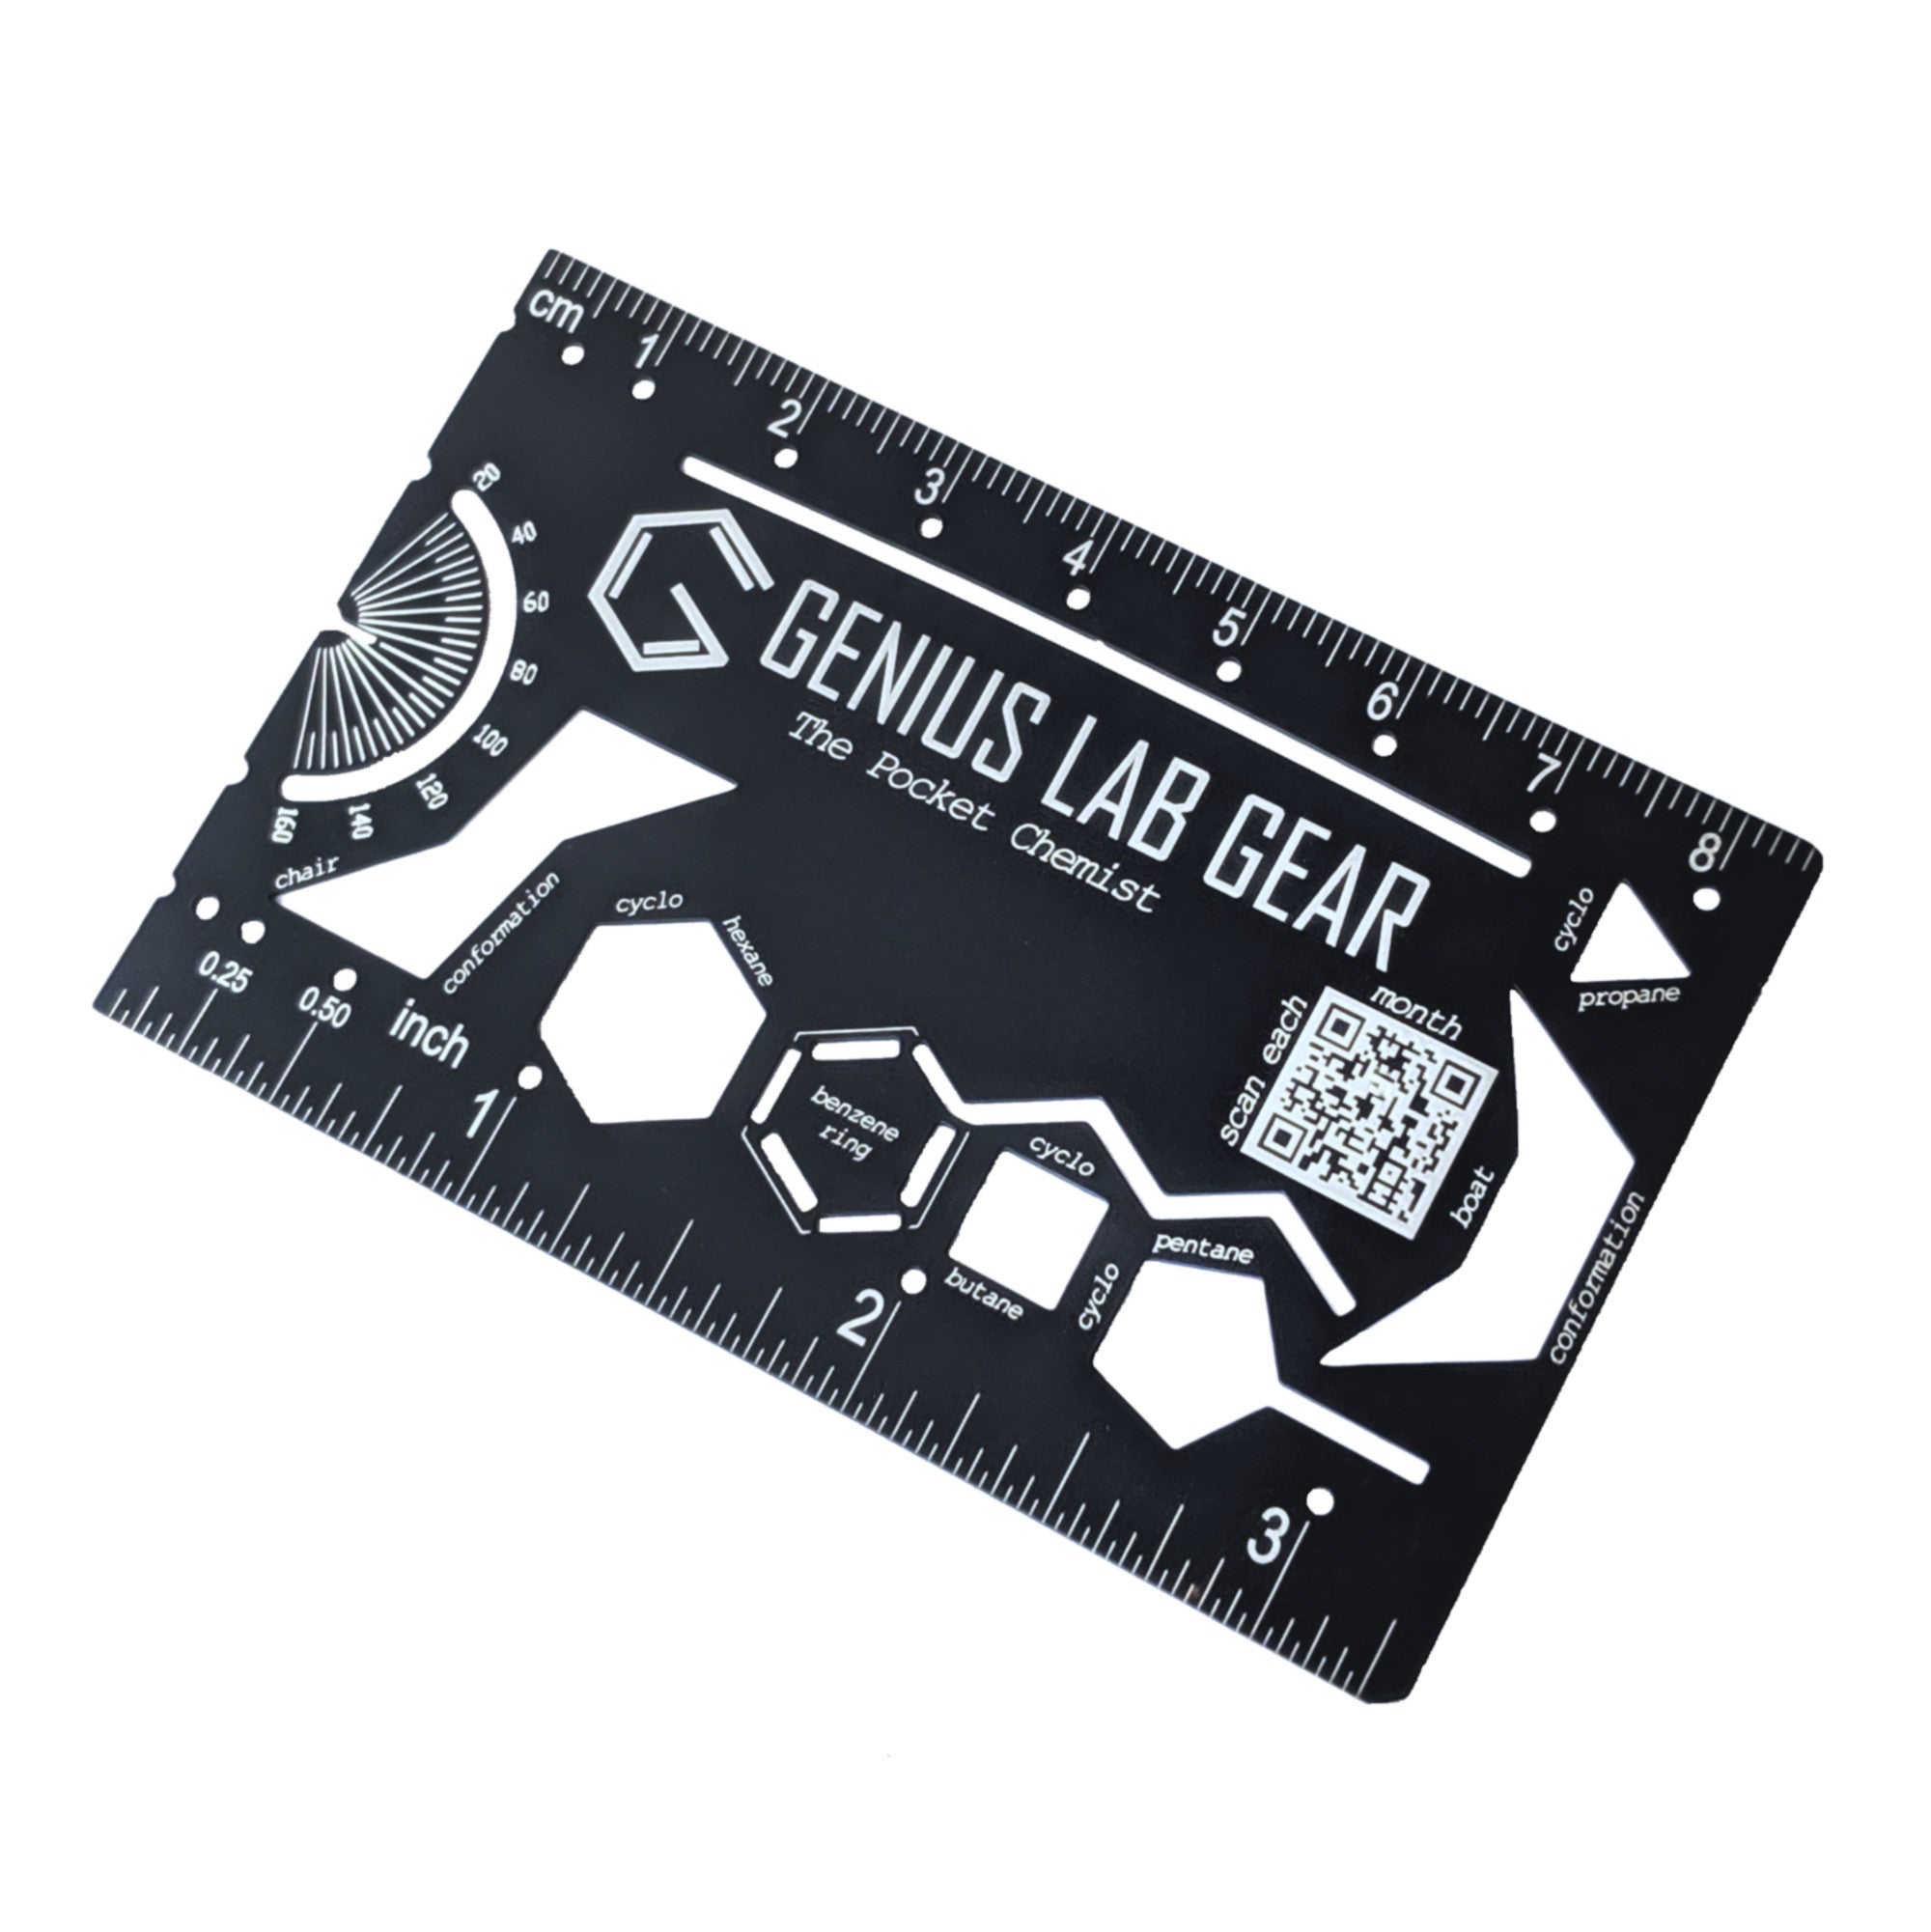
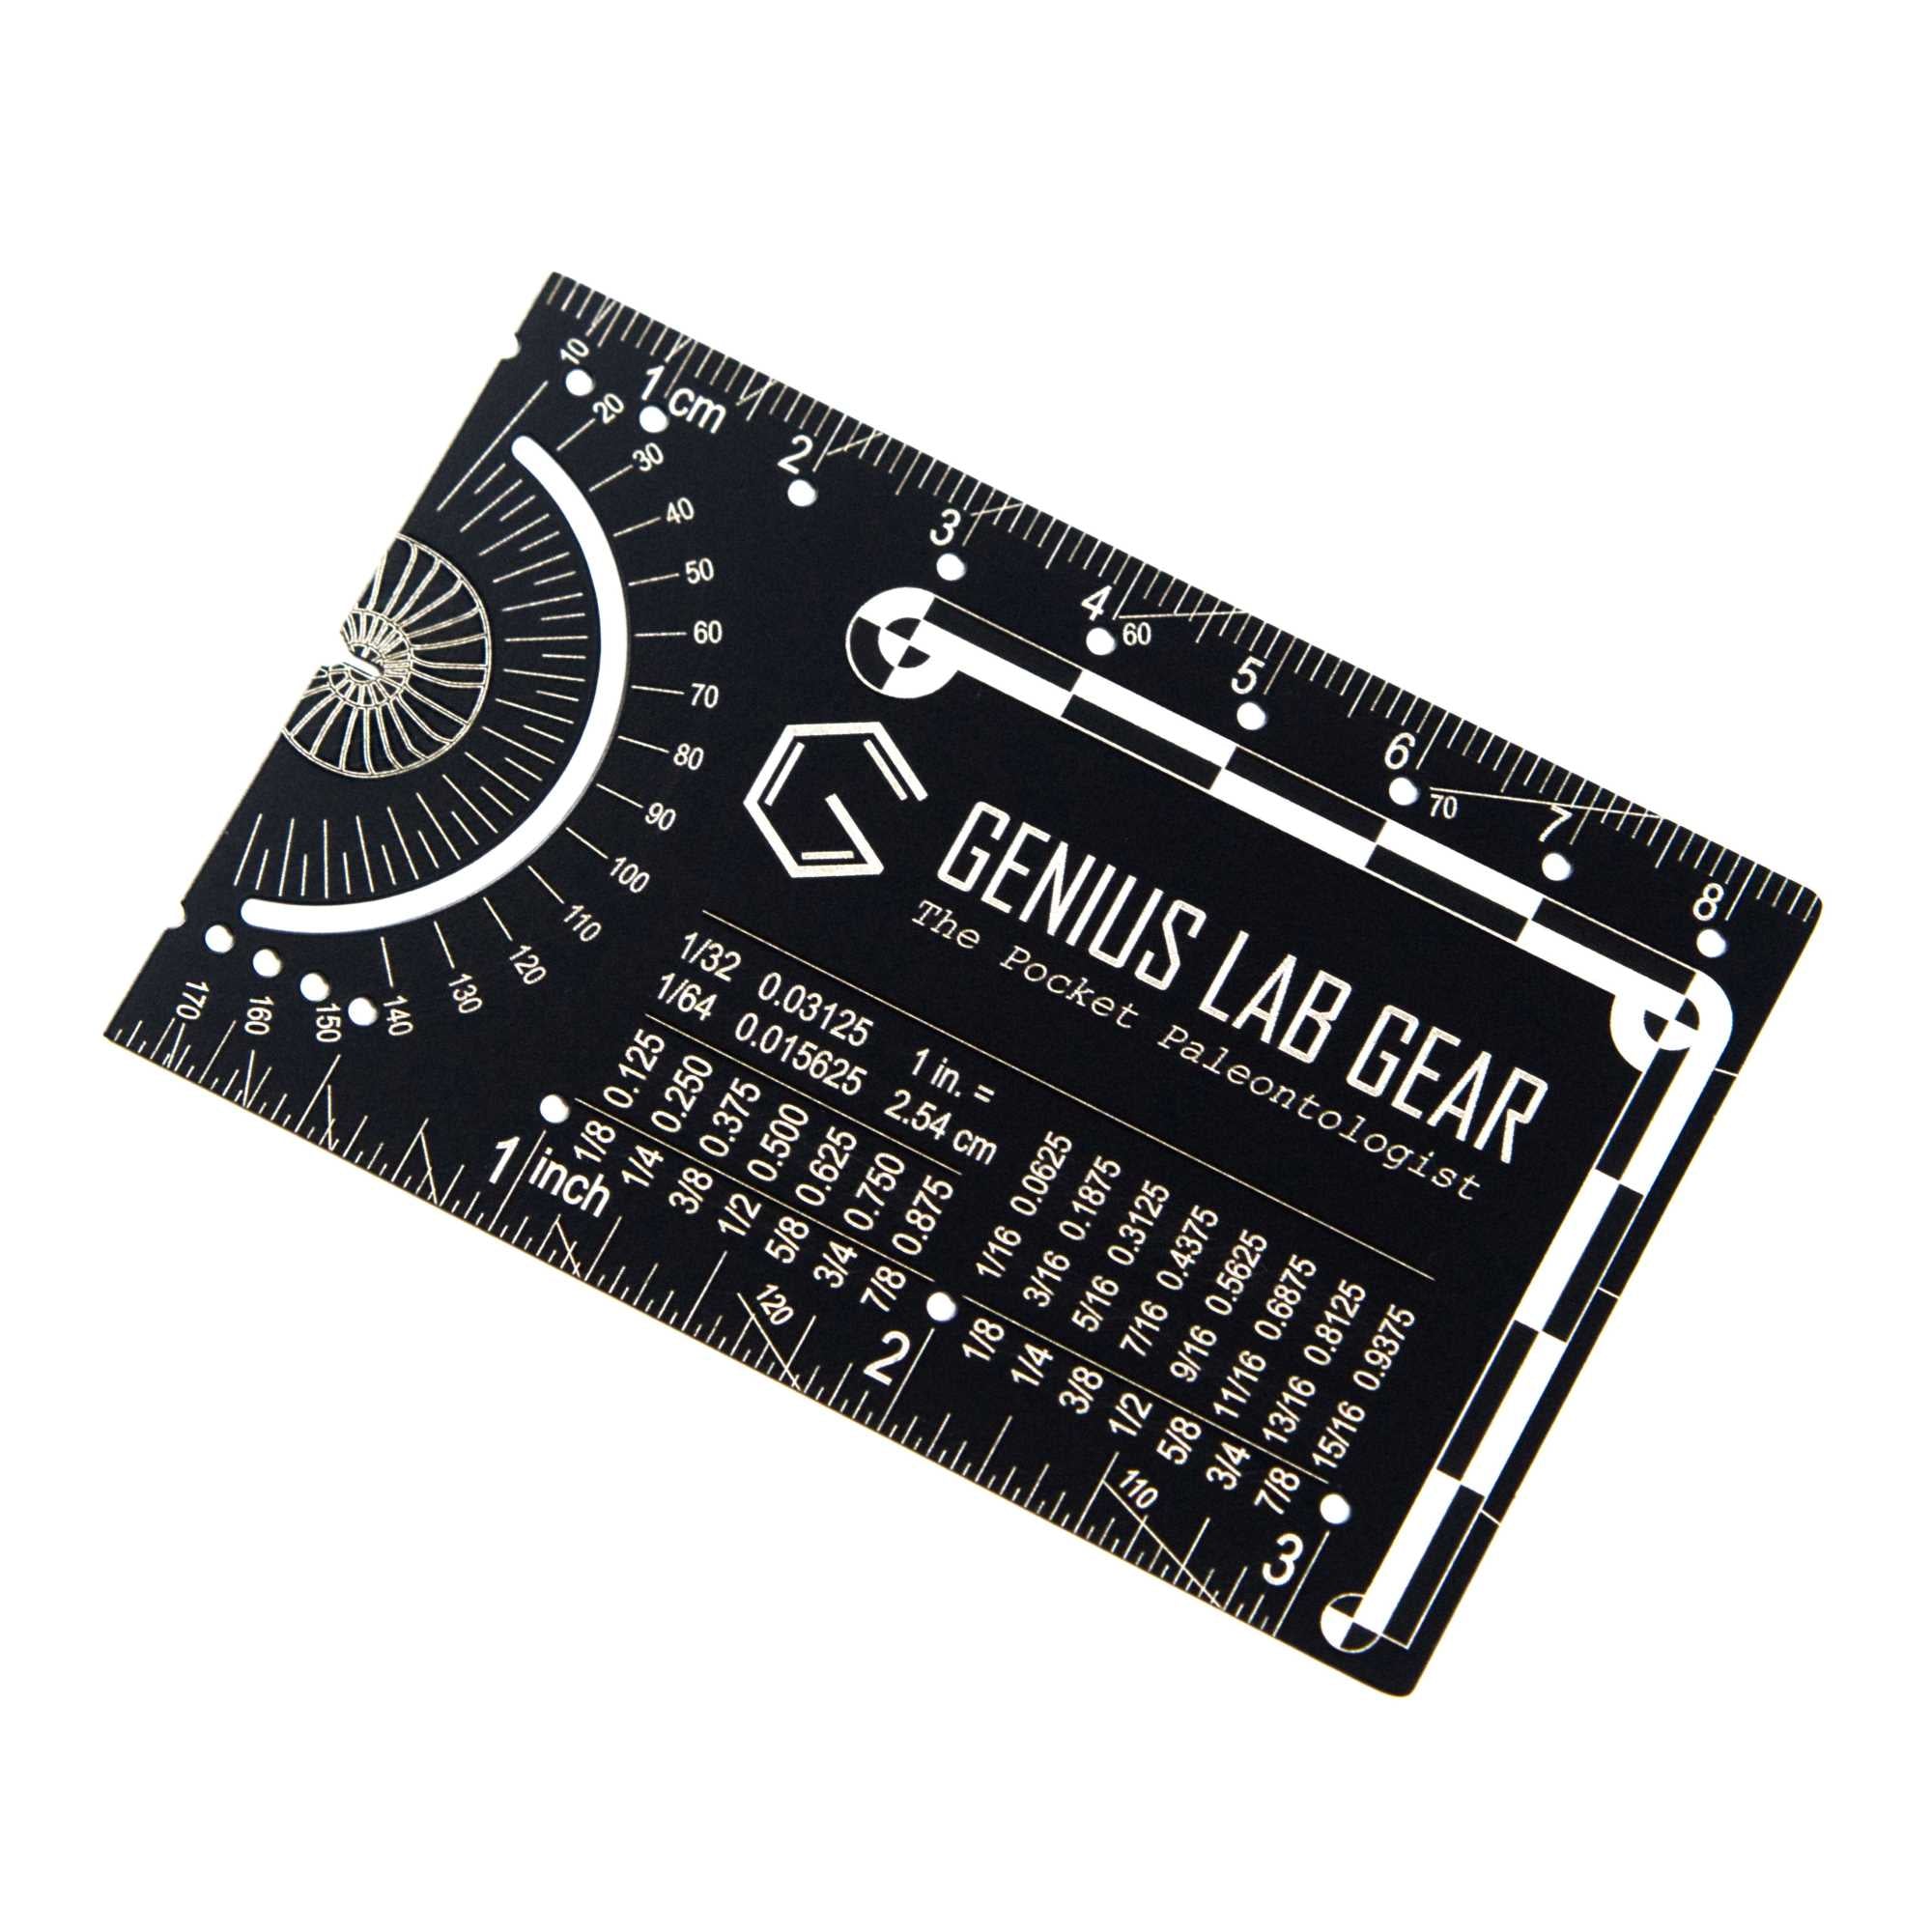
1. Protractor: Angle measurement and drawing tool
The left front contains a 180 degree arc for measuring and drawing angles. The long lines are every 10 degrees and short lines are every 5 degrees. The straight line cutout denotes 90 degrees and can help to quickly draw right angles.
To draw or measure your own angle:
- Align a starting straight line to the flat edge on the outside of the tool.
- Add a center dot to denote your vertex, in the gap at the center of the arc tool.
- Add a dot at the angle you wish to draw. If measuring, find the angle where the line to be measured intersects.
- Slide away The Pocket Scientist and use the straight edge to connect your dots and complete your angle.
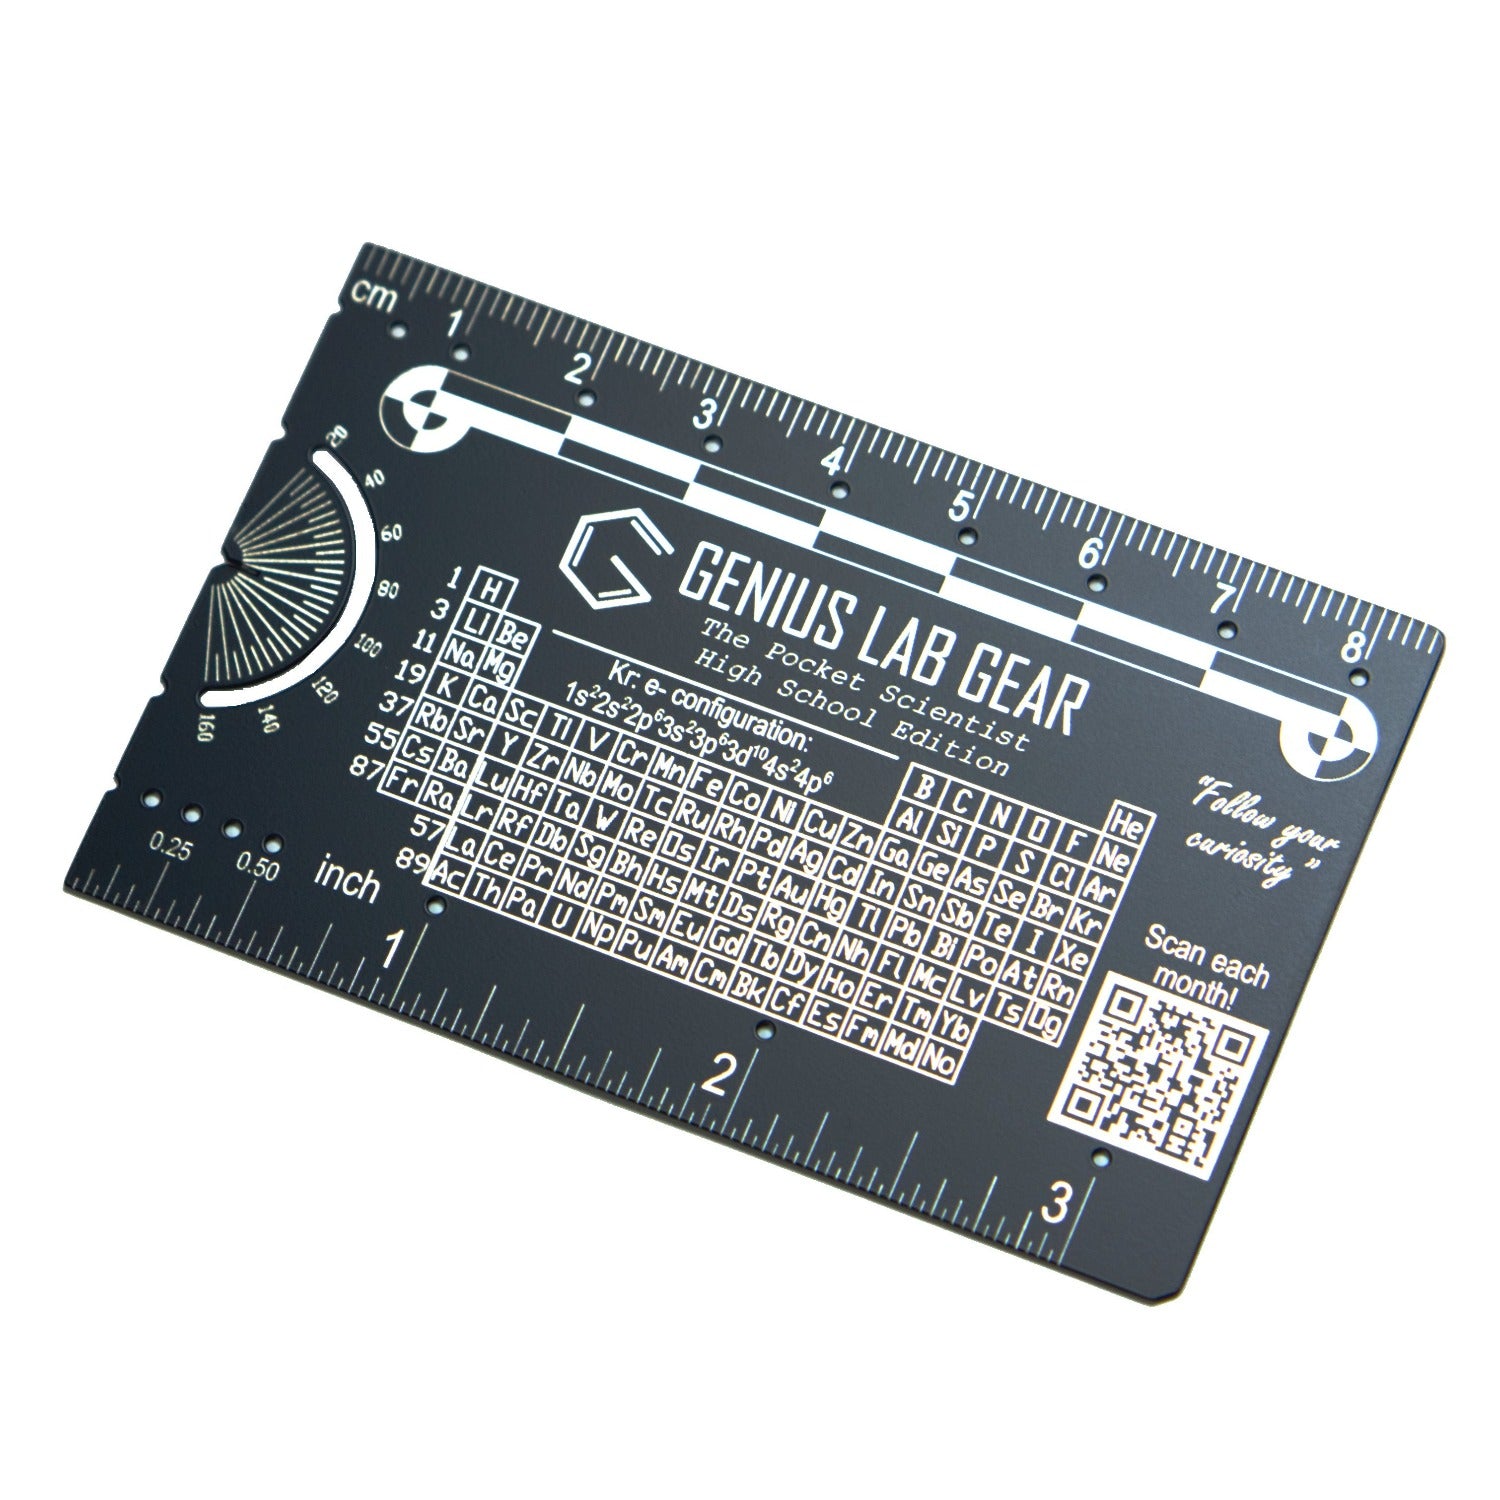
2. Compass: Arc drawing tools (inches and centimeters)
The through-holes lined up with major inch and centimeter markings are for drawing arcs and circles of the corresponding radii like a compass.
To draw a 6 centimeter radius 60 degree arc:
- Create a vertex, 0 degree and 60 degree dots using the angle drawing tool described above
- Line up the half-hole at 0 cm to your vertex dot and the 6 cm hole to your 0 degree angle dot.
- Using two pencils (or one pencil and a sharp narrow object), put one in each hold and with a slight inward pressure drag the 6 cm hole in the desired direction until it covers approximately 60 degrees. Keeping slight inward pressure ensures the arc does not come out jagged.
- Use the straight edge to connect your vertex and 60 degree dots, then extend the line out until it intersects your new arc. Simply put a dot at the intersection if you don't want the connecting line.
- Erase any arc past the intersection point.
To draw an arc with a 0.5 cm, 0.5 inch, 0.25 inch or 0.125 inch increment:
- Repeat step 1 above.
- Instead of using the edge half-hole, start your vertex at the sub-integer hole and count forward to the desired radius, remembering to subtract the distance from the edge to the hole of your vertex.
- Repeat steps 3-4 above.
3. Periodic table
The front of the card contains a full periodic table. The Lanthanide and Actinide series' are at the bottom and a double-thick vertical line denotes where they are inserted in the upper periods. The left side contains a quick reference atomic number for the Group I elements and the space above the table shows the full electron configuration for Krypton to help you decipher configurations of elements before and after it. For Group and Period, simply count left-to-right and top-to-bottom respectively.

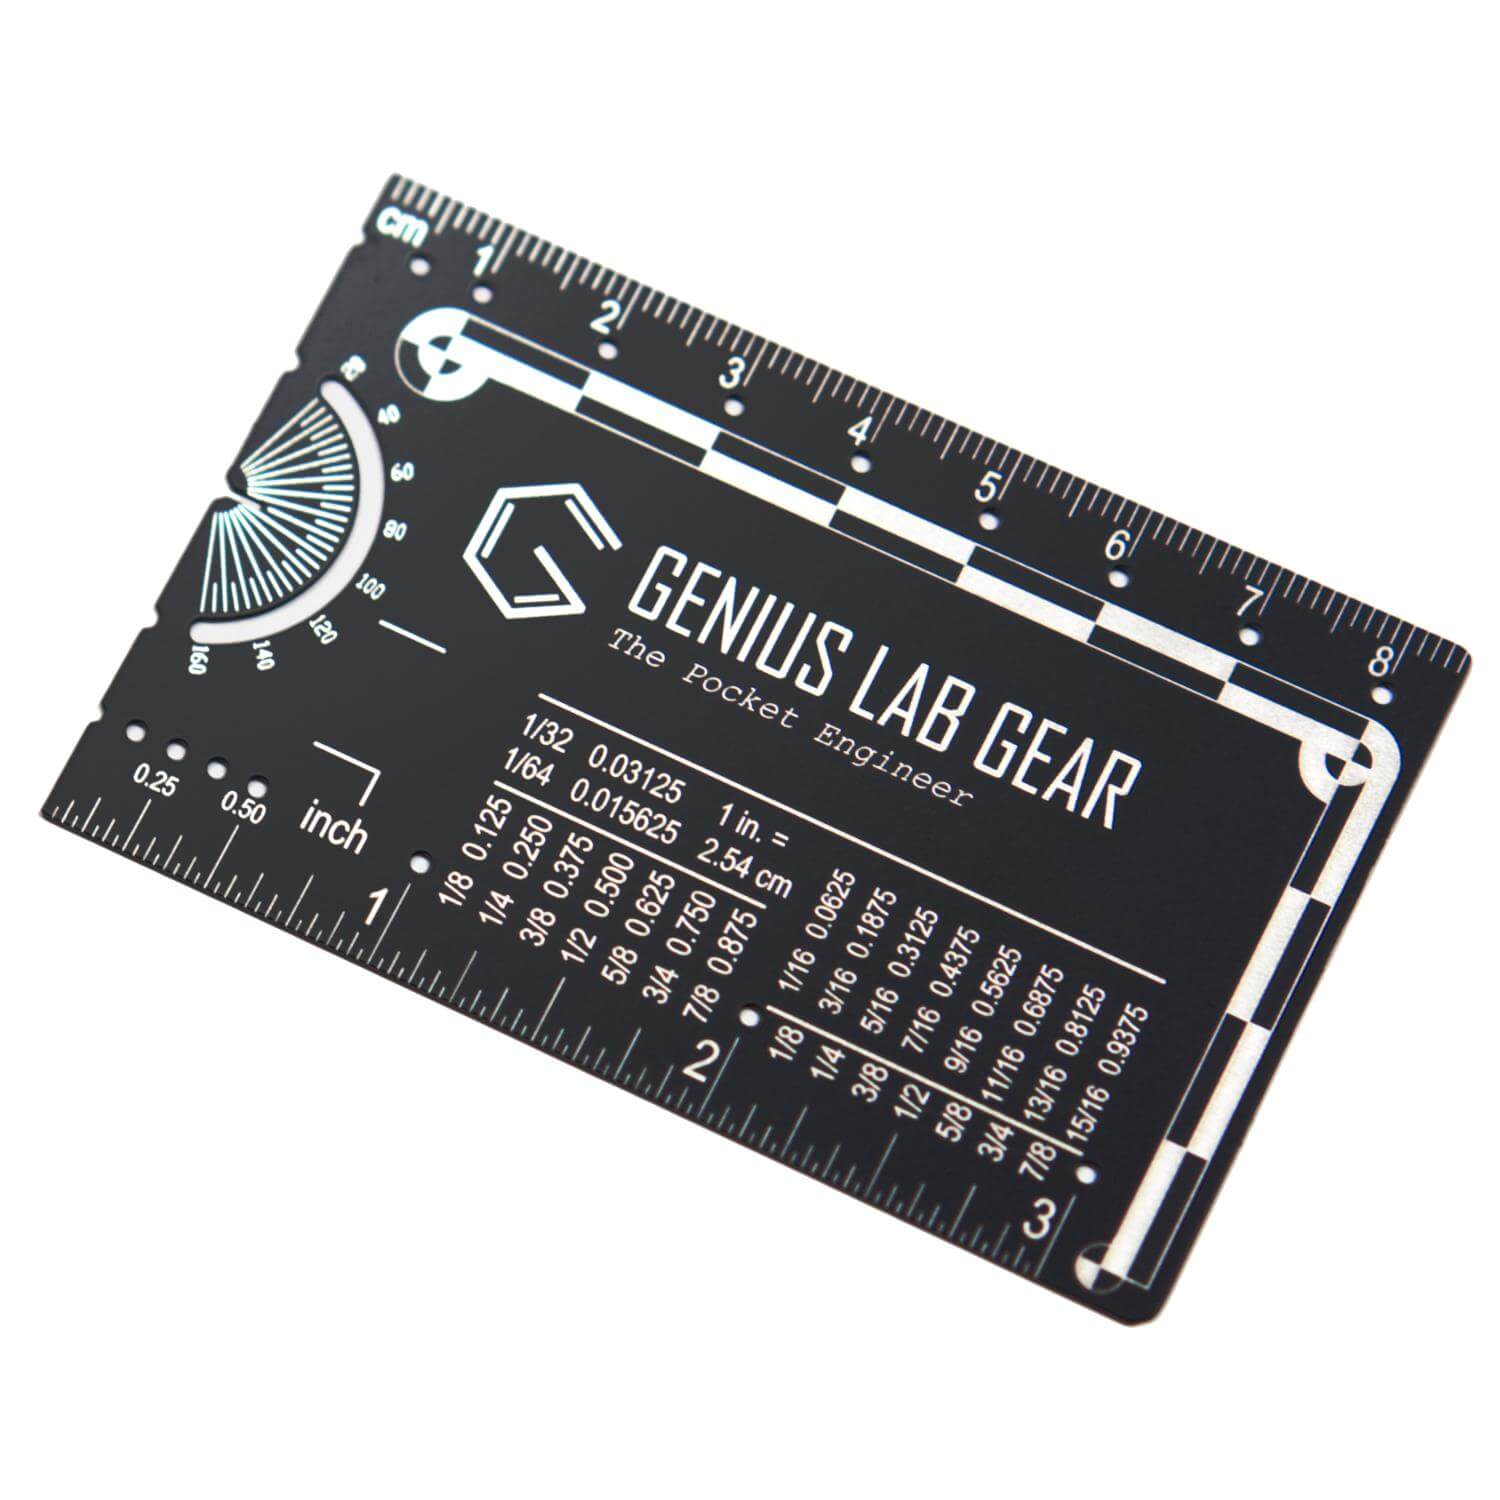
4. Ruler
The centimeter side is marked to each 1, 5 and 10 mm while the inches side is marked down to the 1/32nd inch where each smaller unit has a shorter mark line. Note that the origin (zero) side starts flat (flush) to the edge of the tool. This allows you to easily measure the height or depth of an object on a flat surface. For the highest precision on paper, start your line at the â1â marking instead of the edge.Â
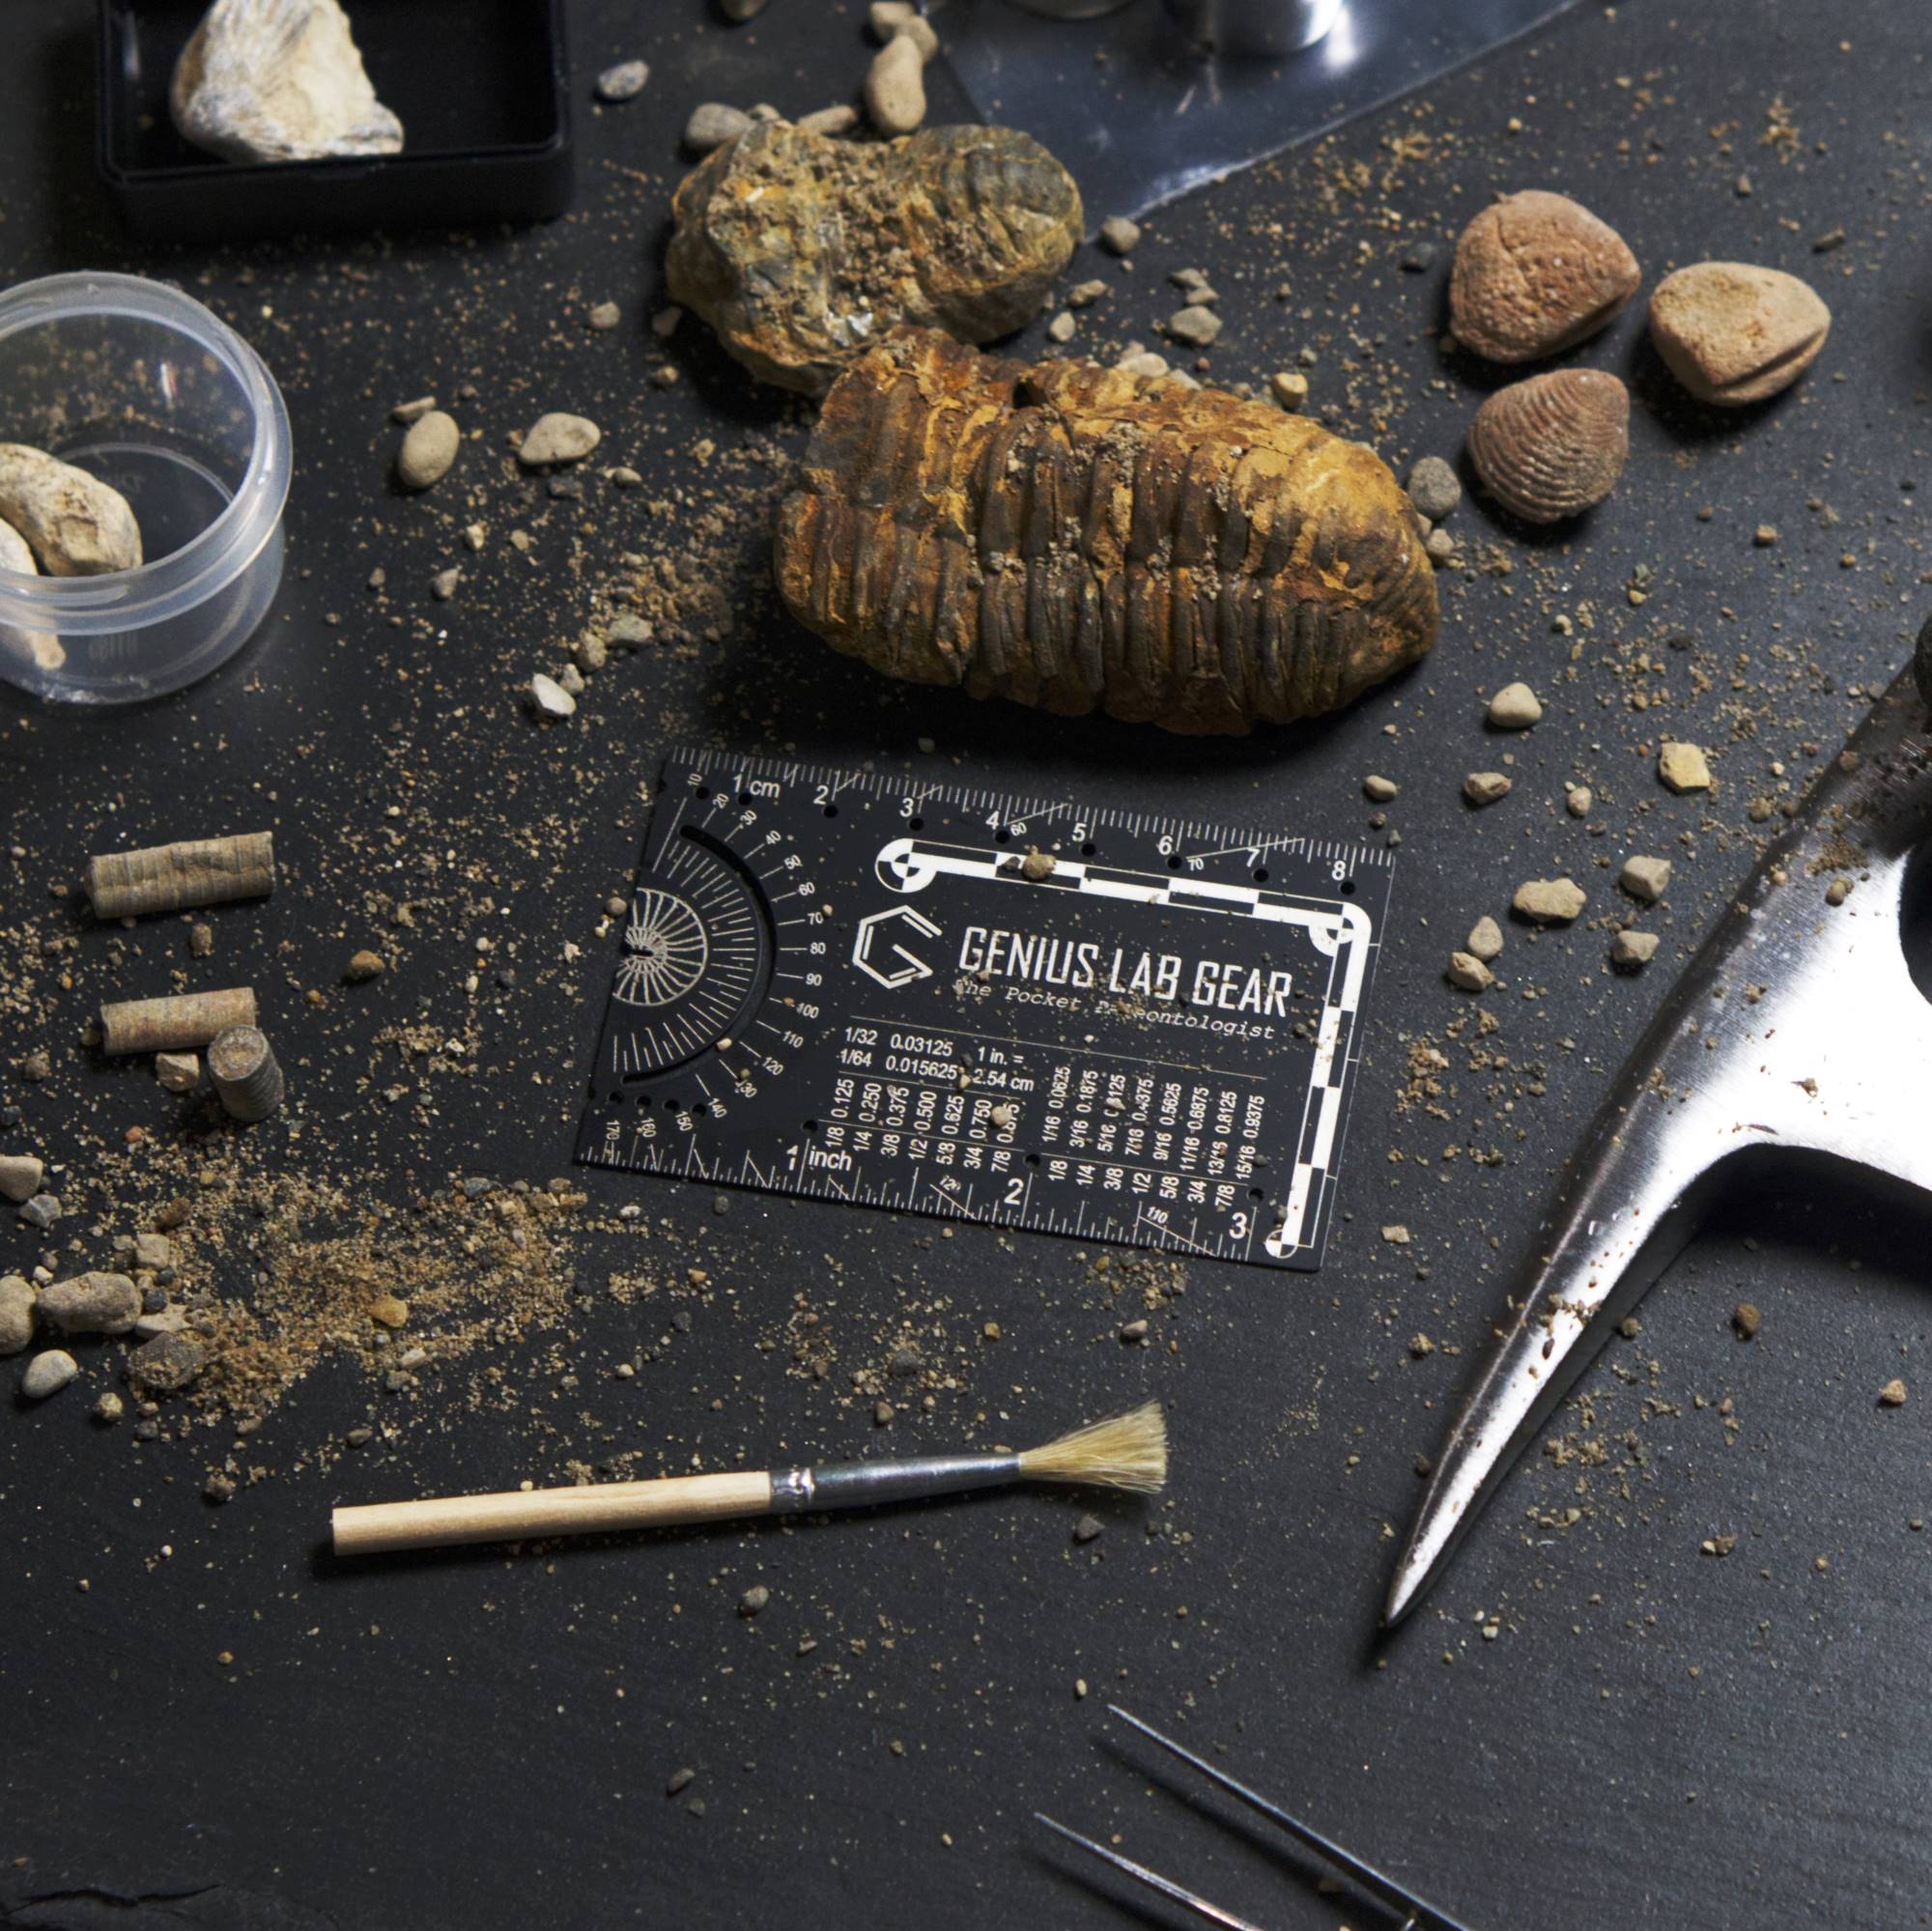
5. Photogrammetric Ruler
The checkerboard-style L-shaped ruler on the front is known as a "photogrammetric" or "photomacrographic" ruler. Google "ABFO #2" to see what the official one looks like. Use this for setting a scale in any photos you take of parts, failure analysis, gaps, or just to be better than a banana for scale showing off your work.
The high-visibility rectangles are 1 cm long and should show up well in a photo with a flash. In the circles, they are 45 degrees in arc length. The L-shape lets you correct distortion if the card is not perfectly normal to the camera and the object to be measured.
Once you have the photo, load it into any software that lets you set a scale like ImageJ. Here you can draw a line and tell it how long in real distance that line is (draw a line covering several 1 cm rectangles). It registers that in pixels, and applies that scale to the entire image. If your image is in perspective, you may need to correct it using a mesh warp or perspective correction tool, aligning the grid to the L-shape on the card. There are also a few small horizontal lines at the 2 cm marks near the arc drawing tool, in case those are helpful in your mesh correction.
6. Tiny flathead screwdriver
You might have missed this one! The bottom right corner (from the front) is flattened. You can use it to unscrew some set screws in a pinch. Don't try to unscrew anything drilled firmly into wood or you'll warp the card. Even though it's steel, it's only 0.5 mm thick. We wanted to use Adamantium, but couldn't find a supplier.
7. QR Code for bonus content
Scan the QR code with your phone each calendar month to view a private page just for card holders. Think of this as an exclusive bonus of being a card holder! Each month, we'll replace the page with new content such as fun science nuggets, STEM jokes, new resources we've found or created, news or upcoming events and discounts on new product launches just for card holders! Our goal is to bring you value, fun and happiness with every scan.

Want to find more cool tools for young scientists? Visit our top-ranked "Best Teenage Science STEM Gifts" shopping list which includes products from all over the internet.